Obsidian WordPress Plugin
This an obsidian plugin for publishing documents to WordPress CMS.
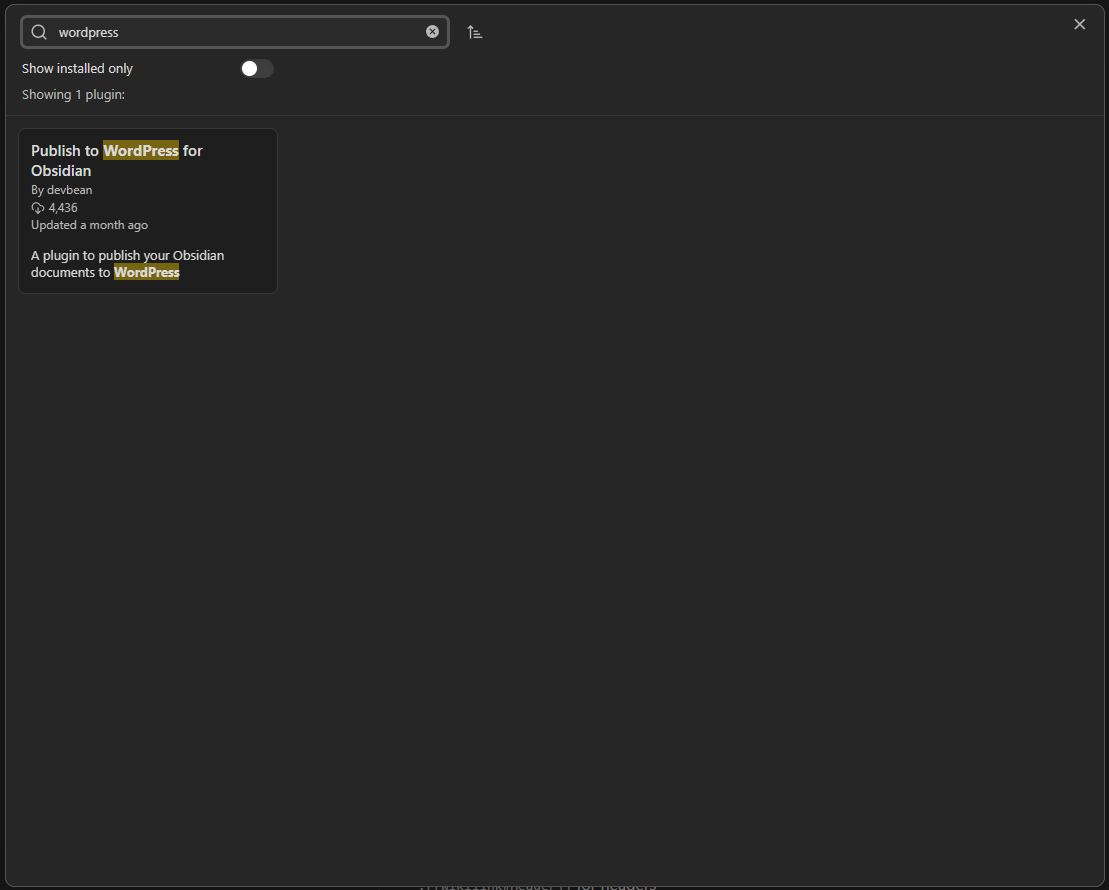
How to install
The plugin could be installed in Community plugins
by searching wordpress as keyword.
How to use
Before publishing, necessary WordPress settings should be done
in WordPress tab of Settings.
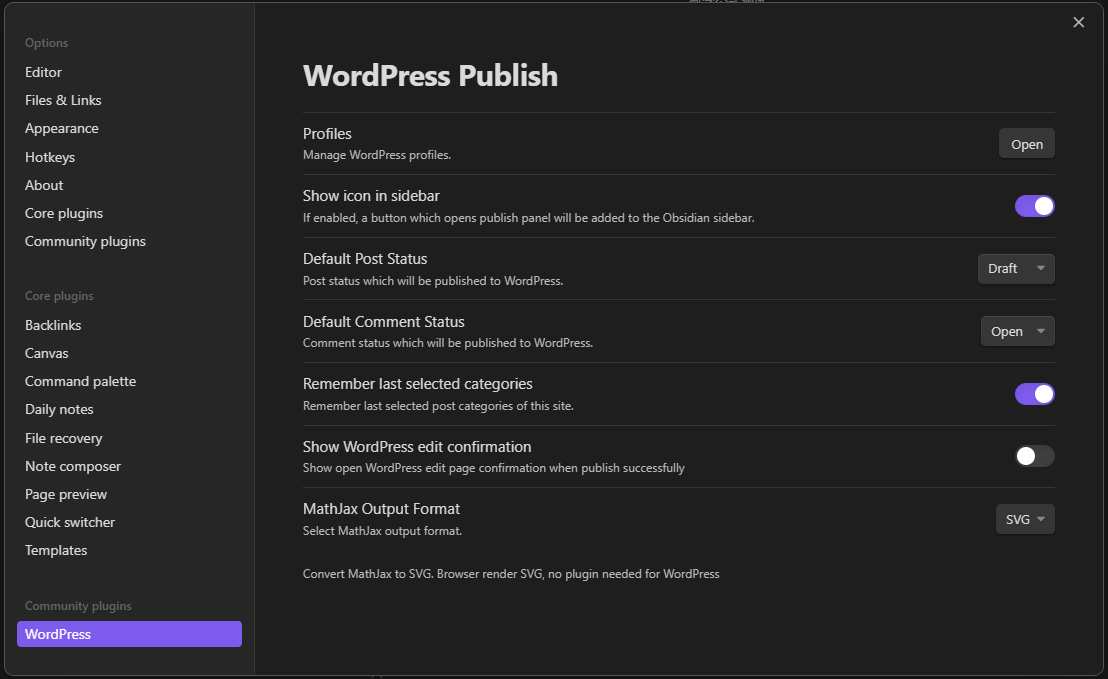
You can find settings as following:
Let’s say a WordPress server could be access by https://www.mywp.com .
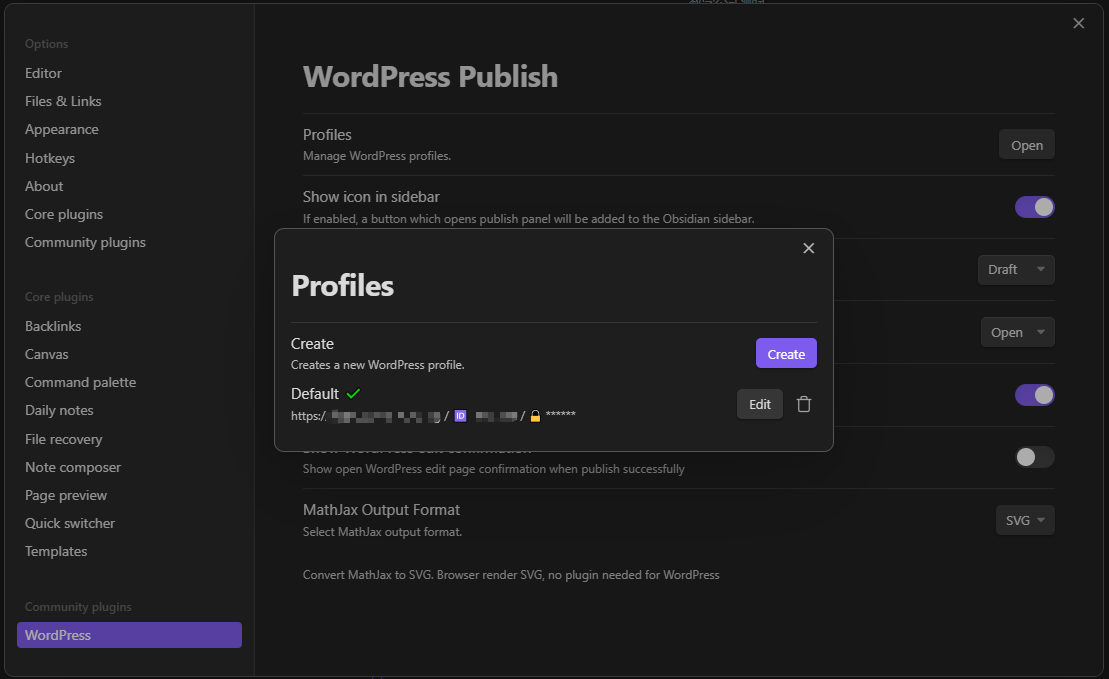
- Profiles: WordPress profiles. You could add multiple WordPress profiles in order to publish notes to multiple WordPress servers.
- Show icon in sidebar: Show WordPress button in sidebar so you could click it to publish current note without opening command palette.
- Default Post Status: Default post status when publishing.
- Default Post Comment Status: Default comment status when publishing.
- Remember last selected categories: Turn it on if you want to remember last selected categories when publishing.
- Show WordPress edit confirmation: Turn it on if you want to open WordPress editing page after publishing successfully.
- MathJax Output Format: Output format of MathJax.
- SVG: An image format that supports by browser so there is no need configure for WordPress. But if you try to edit using WordPress editor, SVG images will be lost for WordPress editor does not support SVG.
- TeX: A WordPress plugin, such as Simple Mathjax, is needed for rendering but you can edit using WordPress editor.
While WordPress profiles could be managed in another modal.
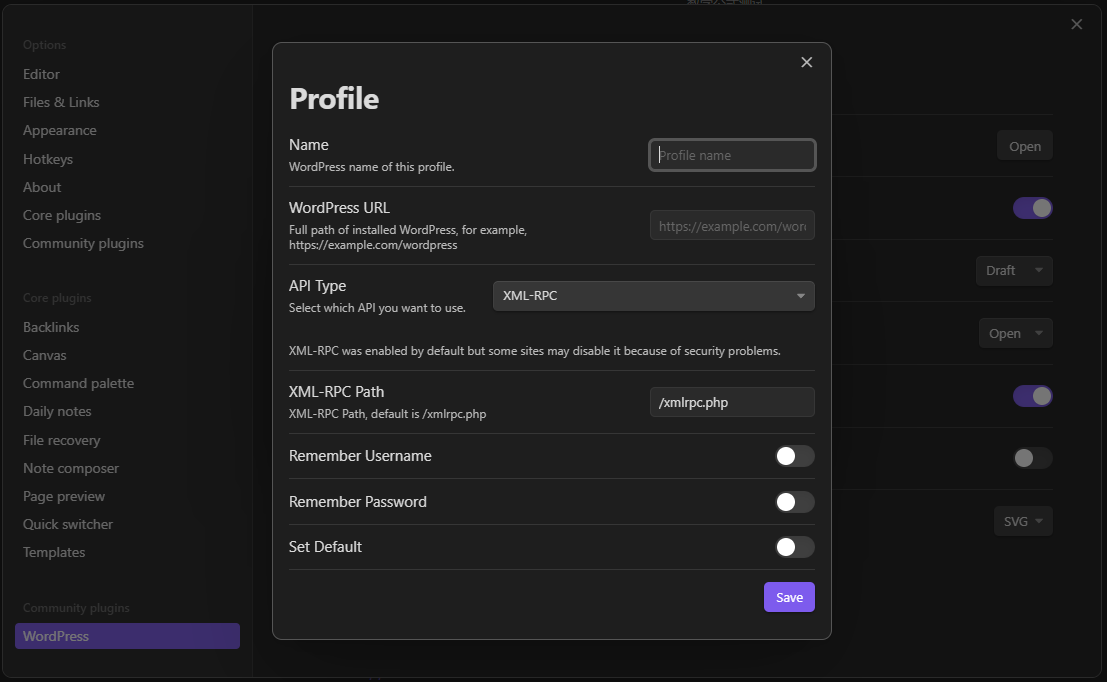
Creates or edits a profile needs such information:
Some need be explained.
- Name: Name of this profile.
- WordPress URL: A full path of WordPress.
It should be https://www.mywp.com. Note that if your site does not support
URL rewrite, you may add
/index.phpappending to your domain. - API Type: At this version we support following API types:
- XML-RPC: Enabled by default but some hosts may disable it for safety problems.
- REST API Authentication by miniOrange: REST API is enabled by default since WordPress 4.7. An extra plugin named miniOrange is needed to be installed and enabled in order to protect core writable APIs.
- REST API Authentication by application password: REST API is enabled by default since WordPress 4.7 while application password was introduced in WordPress 5.6. If you are OK with WordPress 5.6, this is recommended as no plugin is needed.
- REST API for wordpress.com only: REST API is enabled by default on wordpress.com.
Note The mentioned plugins miniOrange must be installed and enabled in WordPress server and configured correctly as following steps.
How to config WordPress plugins
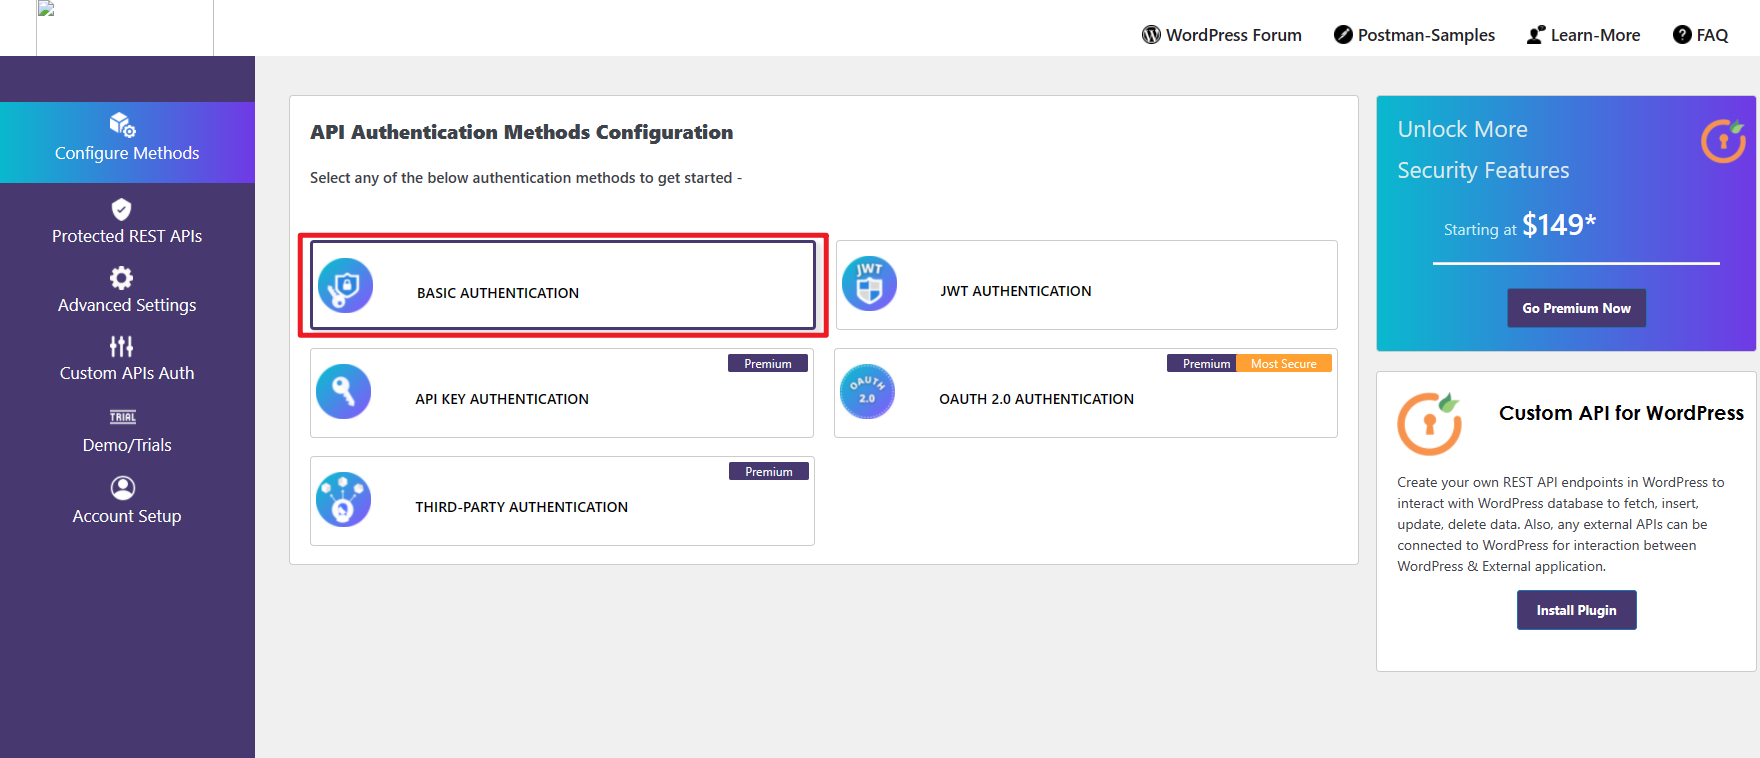
WordPress REST API Authentication by miniOrange
In the plugin settings page, select BASIC AUTHENTICATION.
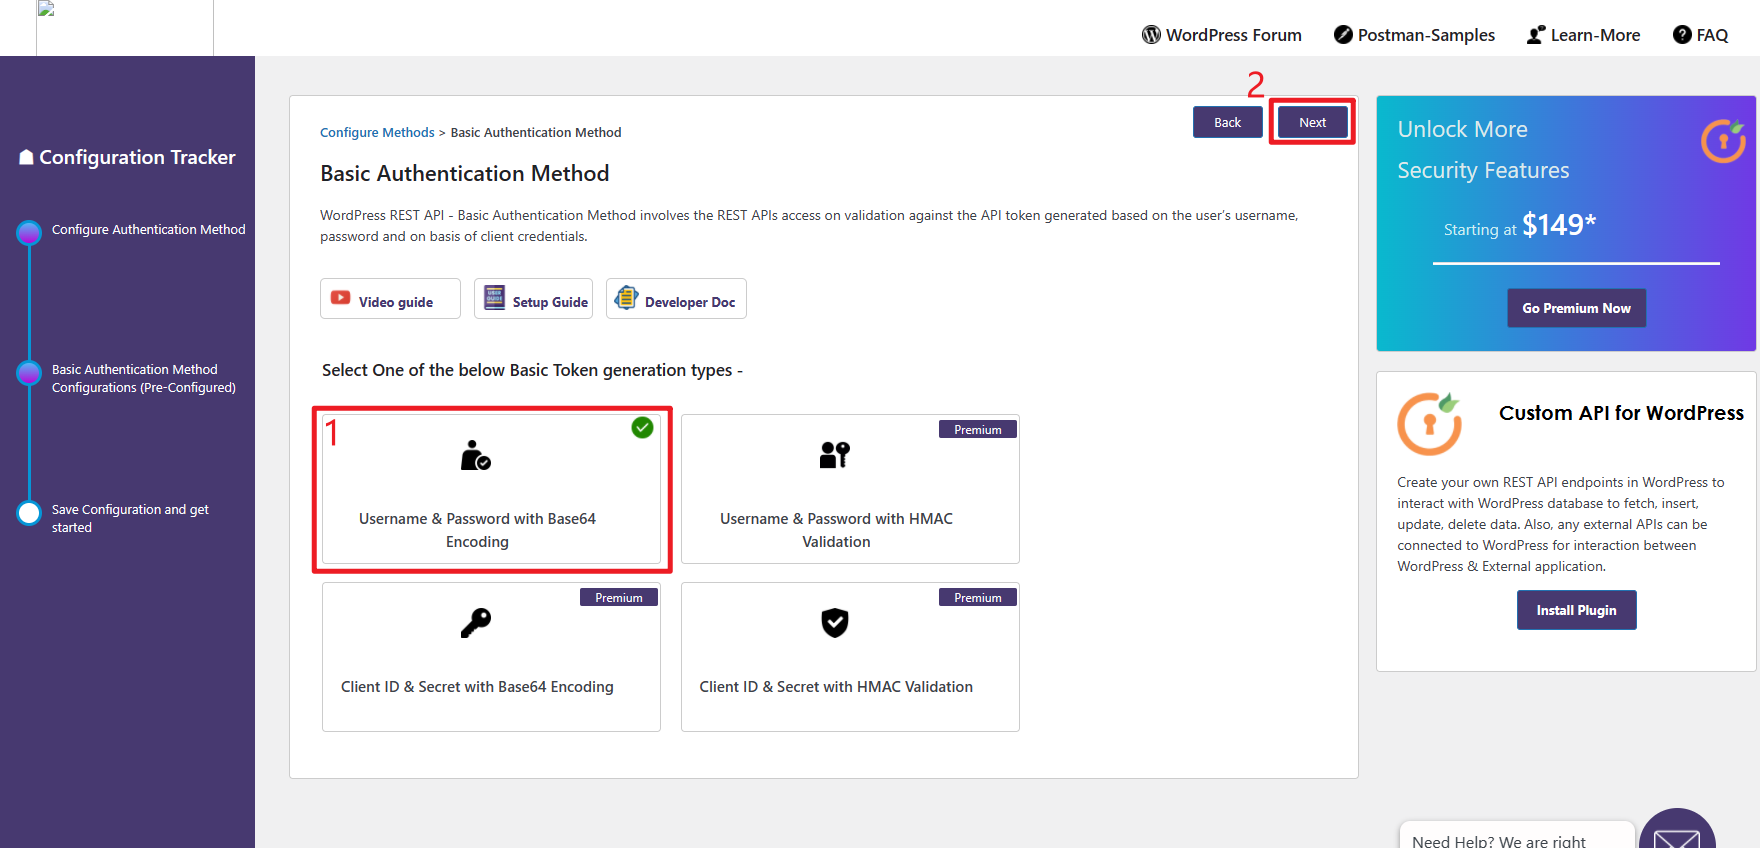
In the next page, select Username & Password with Base64 Encoding then Next.
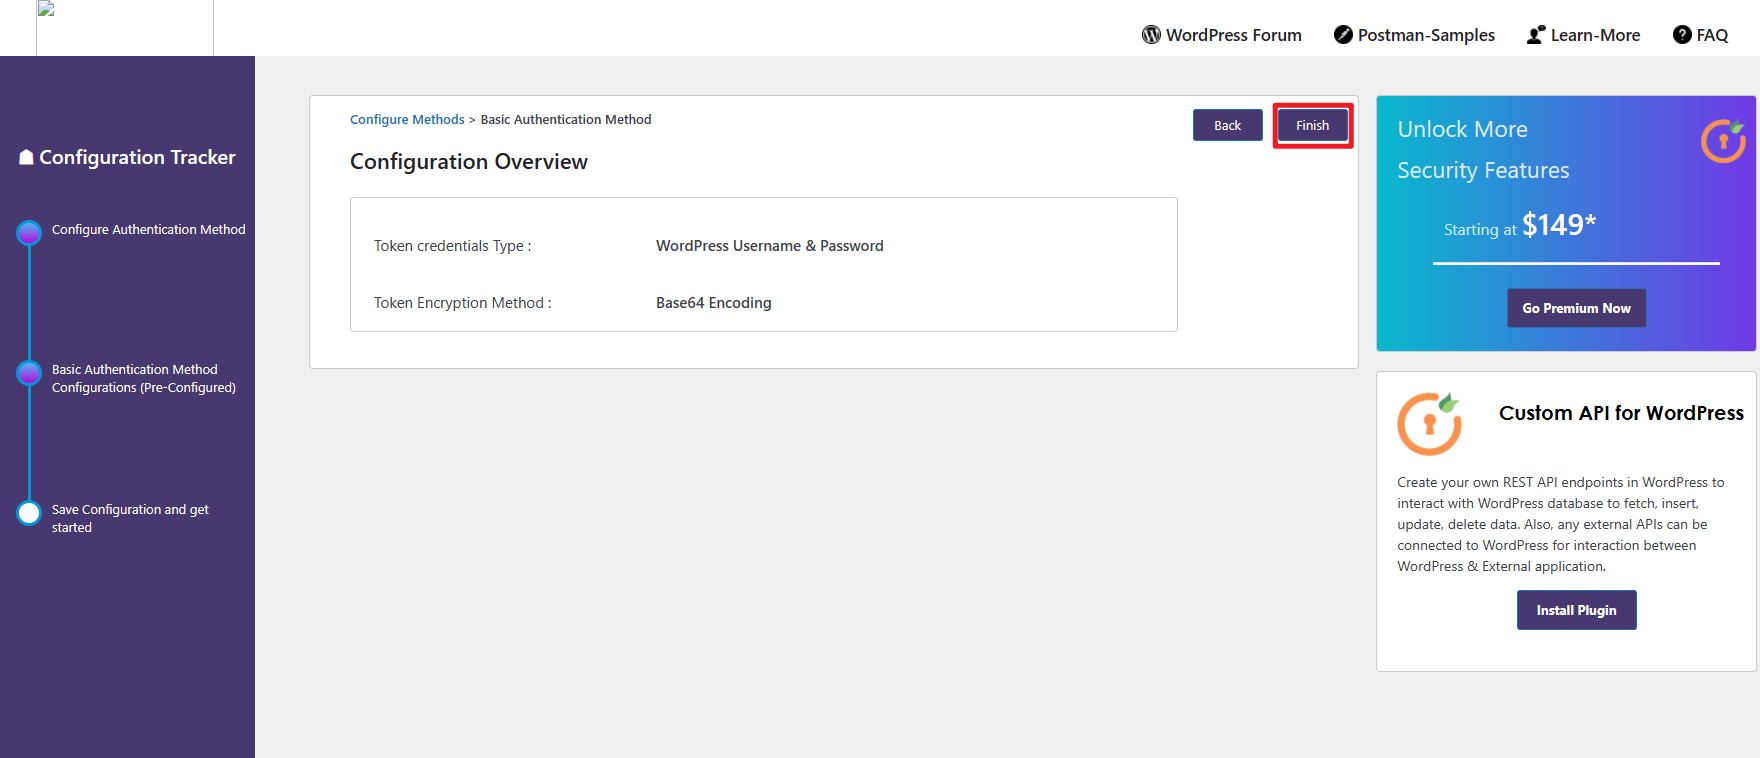
Finally, click Finish.
How to config application passwords
Application passwords was introduced in WordPress 5.6.
You need to login WordPress and navigate to ‘Profile’ page.
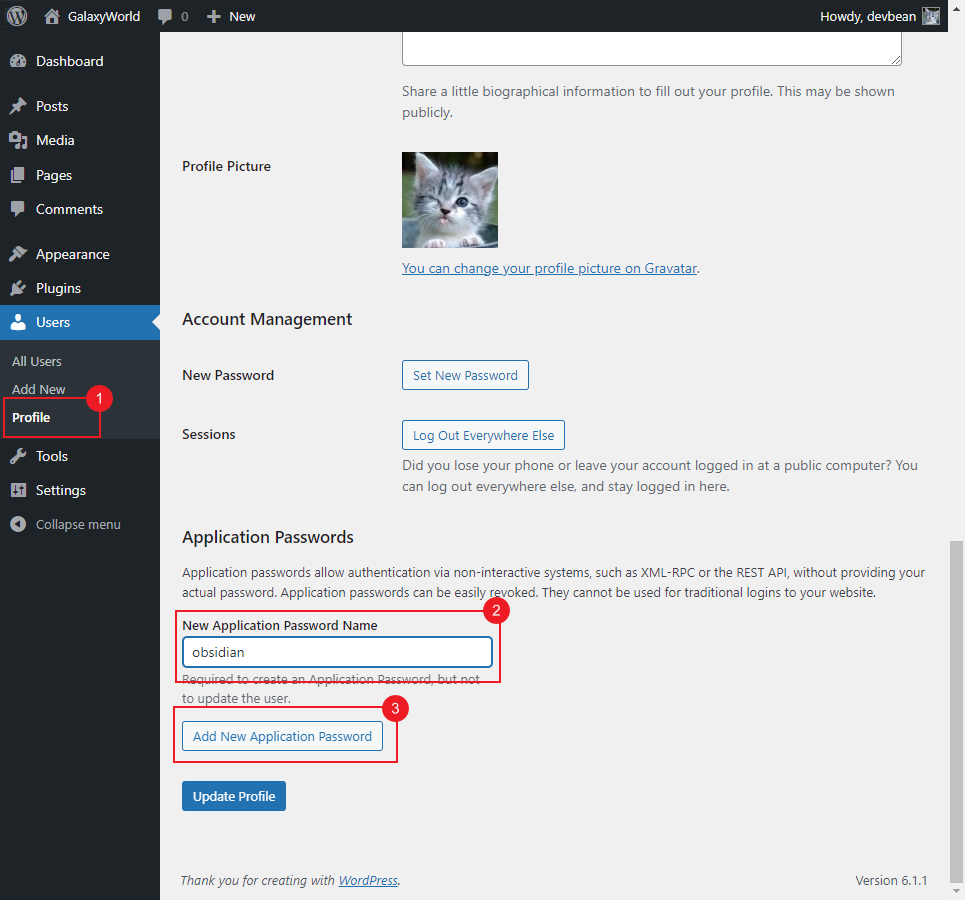
You could use any application name you want, then click ‘Add New Application Password’ button.
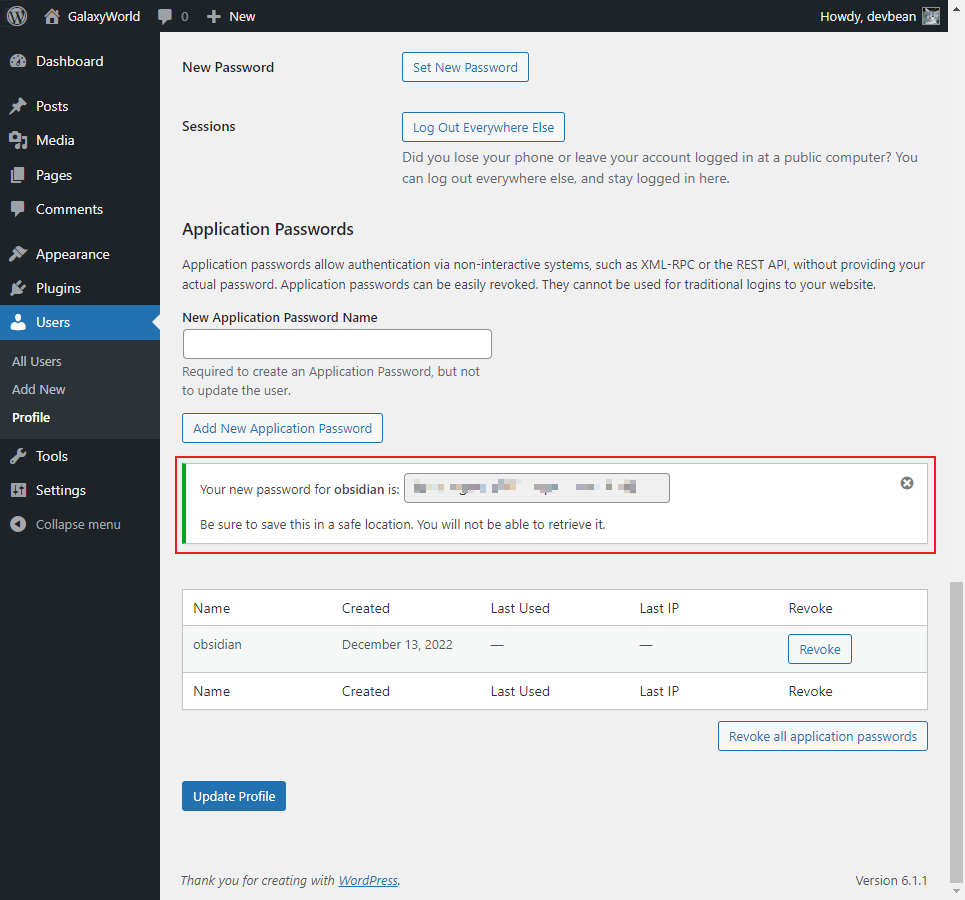
Here you need to save generated password as it only shows once. Spaces in the password will be ignored by WordPress automatically.
Then you could use your login username and the application password in Obsidian WordPress plugin.
How to use with WordPress.com
WordPress.com supports OAuth 2.0 to protect REST API. This plugin add OAuth 2.0 for wordpress.com.
When using with WordPress.com, a valid wordpress.com site URL should be input first (let’s say https://yoursitename.wordpress.com). Then select ‘REST API for wordpress.com’, the browser should be raised to open wordpress.com authorize page. After clicking ‘Approve’ button, obsidian.md should be raised again and the plugin should be authorized.
Note, the plugin fetched wordpress.com token might be expired in two weeks by default. If publishes failed some day, ‘Refresh’ button should be clicked in order to get a new token.